Skin tones:
Five interpretations of one RAW file
- or: how to top the Olympus jpeg engine
Step by step. Wolfgang Lonien talk in his post "Colours" from yesterday, June 5 about his slow approach to reach perfect jpeg-files. He started last sunday with blacks and showed us some nice pictures with some basic colours like blue, green and yellow which he has taken yesteday morning. Wolfgang worked just with the newest version (4.0.9.) of the softwarer RawTherapee for his research. He told me in his blog, that because of that... " what you see here are not the original (and in a way legendary) Olympus colours".
However: His colours were very very nice and I have to ask him some quesions about the loosing of the Olympus colours in using a "non-olympus Raw-Converter". Wolfgang: Does that mean, that -in terms of colours- it doesn´t make ANY difference whether you use a Nikon or an Olympus or a Leica if you shoot in Raw AND use only an "independant" Converter??? For me that would be a new information and I am not shure about it! I know of course that even RAW files are not absolutely untouched and some kind of -as an example - noise reduction and some other things are part also of the raw files. RAW Therapee goes very deep into the basics of these files. I know that. As an example the RAW Therapee Olympus E-PL 1 files have a size of 4088 x 3076 pixels (that means that they show some pixels on the edge of the file wich viewer 2, the Olympus Converter, doesn´t show, because of some intern reserve (distorsion correction abilities).
But, does that mean, that there are NO, ABSOLUTELY NO diferences between two Cameras of different manufacturers in terms of colours, when shooting in RAW?
I would feel that the outstanding Olympus jpeg engine is one thing: No other cameras could do such files right out of the camera.
But: Isn´t it still "Olympus" what Wolfgang showed us yesterday?
As a supplement to his yesterday posting I want to show here in five examples how I would process a RAW file just with four or five settings in the Olympus viewer2 software and only wih this software to achieve something I would call very descent skin tones.
File one: Just out of the camera (no post processing!) I simulate here an "in camera setting sRGB" In fact I did this with viewer2 because normaly I set the camera to Adobe RGB.
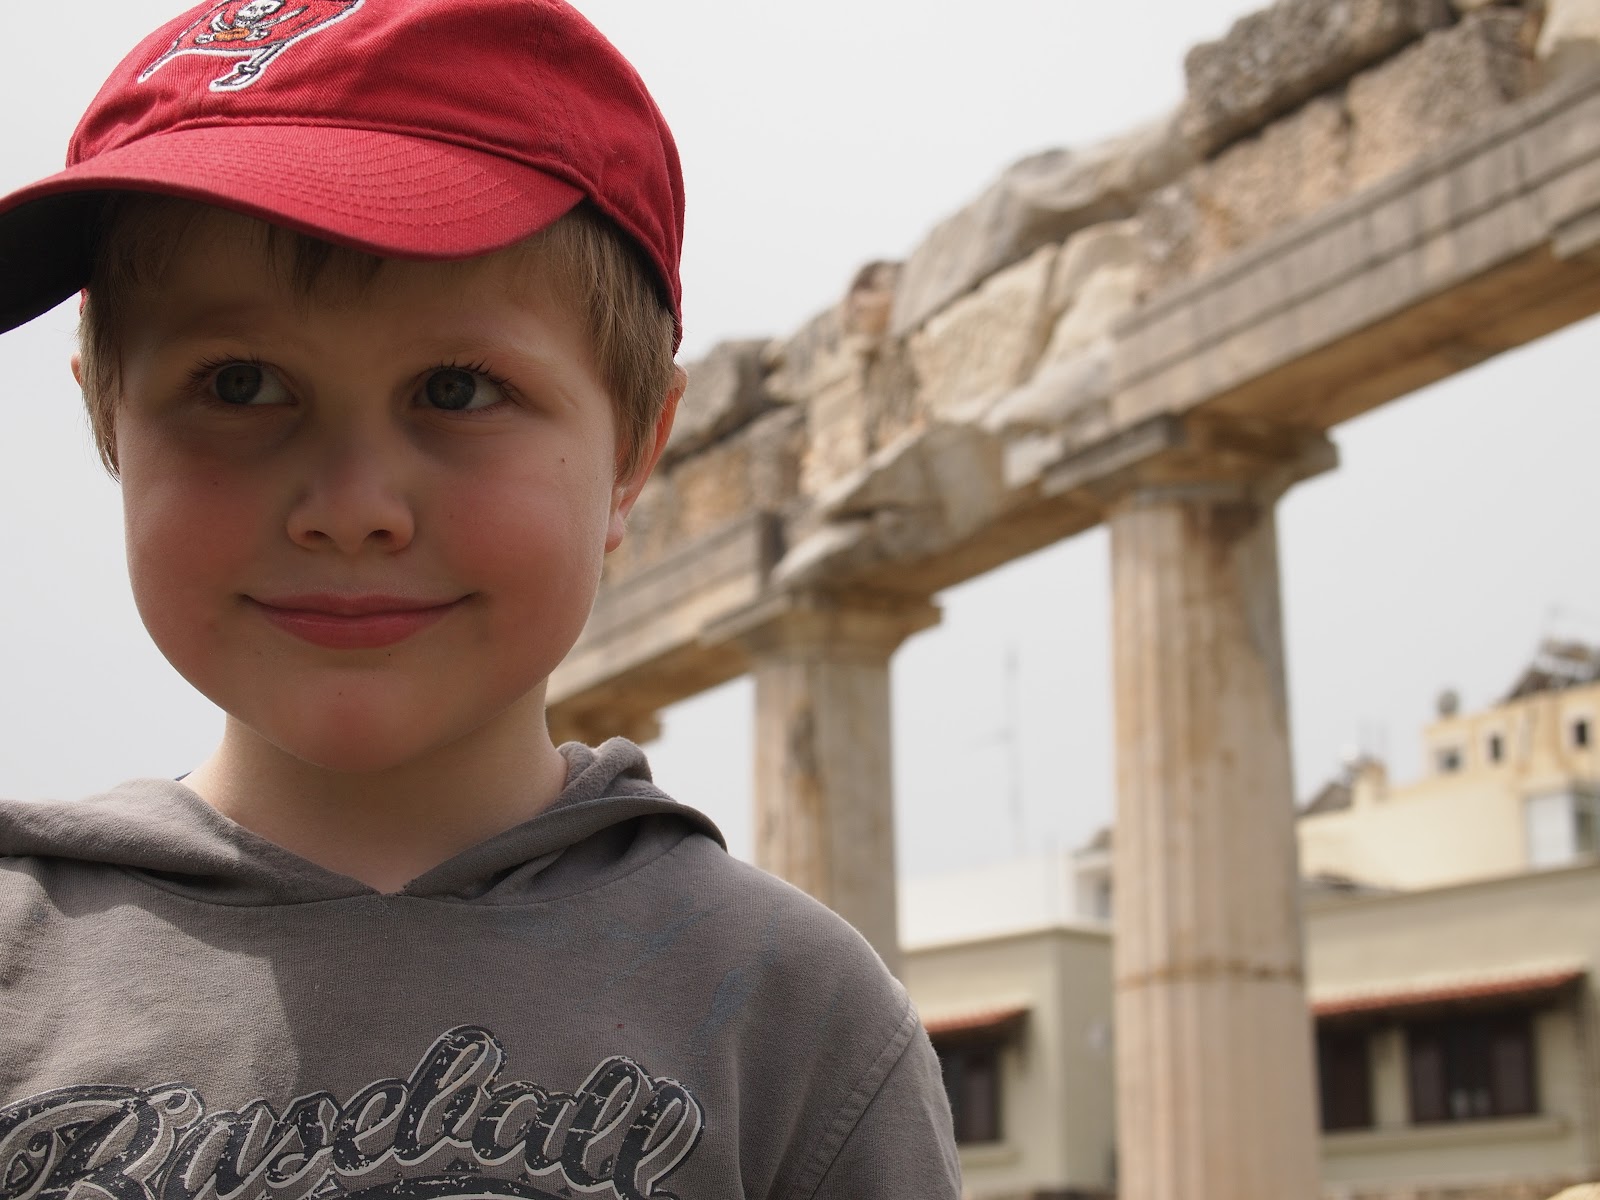 |
| Julian, Kos 2012, Mai 01, around noon (9.39 UTC) |
So: what you see is sRGB interpreted (from your browser) as sRGB, absolutely no post processing. The noise reduction was set in the camera to "off". Sharpening was +/- 0!
Perhaps this file is your favourite and I would not be angry with you. Nice colours, but out of the Camera slightly oversaturated and a little bit on the warm site. Better than any Nikon would do it out of the camera, I think!
File two: My standard workflow until three days ago
I set the colour space to adobe RGB. Then I use it as it would have been shot in RGB (as an example of course your webbrowser only can work with sRGB). This causes slightly less saturation. Perhaps nearer to the physical truth as the picture on the top (because the E-PL 1 produces in correct application of sRGB a saturation of 103.4 % (Imatest)).
 |
| adobe RGB interpreted as if it would have been shot in sRGB, while it was nearly high noon and the light was harsh and blueish, I think this is closer to physical reality |
File three:
 |
| Alternative workflow to achieve these beautiful Leica X 2-"Ming Thein"-colours:The Raw-file was developed by a Gamma setting to 0.8 and an exposure addition of + 0.4 EV. Perhaps I took a little bit to much saturation from this file (saturation was - 20). The sharpening I did was really brutal: Fist I set in the Raw developer the sharpening to + 1 (of max. 2). Then I sharpend the resulting jpeg to +5 (of max. 7). Perhaps to much, I know. But: look at theese beautiful moiree. This is because of the extremely thin AA Filter in the E - PL 1, which allows overwhelming sharpnes! White Balance was corrected by using Julians shirt (it has a nice grey and it is 100 % cotton, so I have no problems with uv highlights which could influence the white balance to much if a person wears synthetic fiber |
A close look on file three which is extremely analytic, shows us the problem. Because also on the field where the ruins in Kos stood was some green gras, you can see a very veryslight greenish tint in that file (and just in that!). So I went on and eliminated this greenish tint and voila
File four:
 |
| Same settings as file three, but green was set to - 5 / 100 |
I prefer file Nr. 4, alsough it is sligtly (obout 0.2 ev or so) developed to dark and slightly (about 5 / 100 or so) undersaturated
But what about this:
File five:
all that postproduction stuff just right in the colour space you will use it in (sRGB interpretet as sRGB and then the Corrections of Gamma, EV, and saturation). Let´s take a look!
 |
| sRGB interpreted as sRGB, all postproduction settings are the same as in file four |
Thank you for viewing, would be nice to receive any comments!
No comments:
Post a Comment